Thursday, January 24, 2013

Queen of Hearts


I am using the beautiful Artwork of Jose Cano
You require a license to use this artist. Now selling at Scraps and the City
Font:Waterfalls 
 PTU Scrapkit mini from Hungry Hill purchase this kit and many others Here 
Mask MB AND SW mask34 by Staci Moon Beams and Spiderwebs 
 This Tutorial was created using Corel's Paint Shop Pro®
 with the understanding that you have a working knowledge of this program.
 (I used PhotoX5 but you should have no trouble recreating it with earlier versions of PSP)

 Open a new image 600 X 500 transparent 72dpi select all 
 open and copy paper 5 paste into selection/ select none 
 apply MB and SW mask34 merge group ,
 open heart spill resize by 40% copy paste or drag to canvas
, duplicate place on either side merge these two layers 
dupicate again and move to bottom merge those two layers.
 open frame 1 copy paste or drag to tag canvas resize by 80%
 open cupcakes resize by 30% move to bottom right. 
 Open tube copy and paste as new layer resize to your liking. 
Add drop shadow Horizontal -2 vertical -4 opac 53 blur 3 color black, 
 duplicate frame drag above tube layer erase part that's covering her face
 then click on tube layer and delete parts that are sticking out 
 open each of the following elements and resize by 30% 
cup-2, cookie, candybox2, bow 1, paper hearts 
drag each element to tag close originals without saving
 now re-size bow 1 again by 30 duplicate and put on other side
 re-size cookie by 30% again. move each element around to your liking.
 open WA2 resize by 30% place on left side. 
 select font tool waterfalls size 48 sharp background white width 1, fill #990000 add your name.

 *****DON'T FORGET YOUR COPYRIGHTS***** 
 Merge visable to save as PNG.
 GREAT JOB! THANK YOU SO MUCH FOR TRYING MY TUT!
 This tutorial was writen Jan 20, 2013. Any similarity to any other tut is coincidental and completely unintentional. Please do not copy or upload this tutorial to another website. 
 You may share the link to the blog or the tutorial page directly. 
 ☼XtenzivImage☼ 2012 -
All artwork used remains the copyright of the creator.

Monday, January 21, 2013

My Valentine


I am using the beautiful Artwork of Ted Hammond 
 You require a license to use this artist. Now selling at CDO 
PTU Scrap LHD Valentine Mini1 Here 
Mask MB AND SW Forum mask 7 by Staci Moon Beams and Spiderwebs 
Filter Eyecandy5 Impact gradient glow 
 This Tutorial was created using Corel's Paint Shop Pro® 
 with the understanding that you have a working knowledge of this program.
 (I used PhotoX5 but you should have no trouble recreating it with earlier versions of PSP) 

**Program Tip: If you highlight your text and highlight the font name in the dropdown you can scroll up and down though your fonts to preview how they look on the tag** 

**REMEMBER TO CLOSE ORIGINALS WITHOUT saving changes.***

 Open a new image 600 X 300 transparent 72dpi select all 
 open paper 1 copy and paste into selection 
 add a new raster layer open and copy paper 4 paste into selection/ select none 
 apply MB and SW Forum mask 7 merge group 
 change blend mode to soft light.
 open paper 2 change image canvas size to 600 x 300. 
select all, selection modify- contract by 10. 
 selection invert copy and paste onto tag. (making the frame)
re-size by 80%
 Add drop shadow vertical -3 Horizontal -4 opac 57 blur 8 color black
 open Wordart 1 re-size by 40%  
 move to bottom right corner of tag. 
 open and re-size element 26 by 70% move to bottom left of tag. 
 Add drop shadow vertical -3 Horizontal -4 opac 57 blur 8 color black
 open and re-size element 30 by 30% do this twice.
 drag heart from layer pallet onto tag 5 times
 move the five hearts around to your liking or see my tag for placement. 
open and re-size element 23 by 30%. Move to bottom right
duplicate and merge the two. duplicate again and place on the other side near the top.
open and re-size element 7 by 30%. copy to tag
duplicate x2 and move the flower to desired location or see my tag for placement
Add drop shadow vertical -2 Horizontal -2 opac 57 blur 3 color black
open element 18 copy to tag i put it underneath the flower layer.
make sure your on the top layer now paste your tube i re-sized mine by 80% image flip horizontal and placed her foot against the frame.
 Add drop shadow vertical -4 Horizontal -5 opac 57 blur 8 color black
now for your name i used words of love size 48 stroke width 1 color black fill color #f0709d
 *****DON'T FORGET YOUR COPYRIGHTS***

** DUPLICATE THE TAG MINIMIZE go to the original Merge all flatten save as a jpeg. close


AVATAR *** RESTORE DUPLICATE TAG*** 
 open a new image i like the w150 x h200 size but check with your forums rules for correct size allowed for your group. Select all
 click on tag bottom/background layer copy and paste into av selection
 use your selection tool to grab the hearts and place on av 
 same with flower i re-sized by 70%  
paste tube as new layer 
i then dragged my font and copyright layers over from the banner.
 selected the bottom half of the tube layer image adjust blur gaussion blur 3  
i then added a gradient glow using eyecandy impact 5 gradient glow.
add a new raster layer select all selections modify contract x 2 selections invert flood fill black
Merge all flatten save as a jpeg.
 GREAT JOB! 
 THANK YOU SO MUCH FOR TRYING MY TUT! 
This tutorial was created Jan 20th 2013.
 Any similarity to any other tut is coincidental and completely unintentional. 
Please do not copy or upload this tutorial to another website. 
 You may share the link to the blog or the tutorial page directly.
 ¤XtenzivImage¤ 2012 
*all artwork used remains the copyright of the creator.*

Monday, November 19, 2012

Dearhoho


I am using the beautiful Artwork of Ed Mironiuk 
 You require a license to use this artist. Now selling at CDO
Font:Fancy Pants 
 PTU Scrapkit mini from Hungry Hill purchase this kit and many others Here 
Mask MB AND SW mask23 by Staci Moon Beams and Spiderwebs
This Tutorial was created using Corel's Paint Shop Pro® 
 with the understanding that you have a working knowledge of this program.
 (I used PhotoX4 but you should have no trouble recreating it with earlier versions of PSP) 

 Open a new image 600 X 480 transparent 72dpi select all open paper 4 copy, drag to tag canvas apply MB and SW mask23 merge group , 
 open frame 3 re-size 60% copy and paste as new layer, 
 open word art 1 resize by 20% move to top left of tag.
 Add drop shadow Horizontal 1 vertical 3 opac 53 blur 3 color black, 
 open tree re-size by 50% move to left side. 
 Open tube copy and paste as new layer re-size to your liking.
 Add drop shadow Horizontal 1 vertical 3 opac 53 blur 3 color black, 
 open snow re-size by 70% move to bottom 
 open star string re-size by 70%  
Add drop shadow Horizontal 1 vertical 3 opac 53 blur 3 color black.
 Open holly and re-size by 20% place upper right of tag.
 open paper 2 then go to materials pallet and change foreground properties to black change fill properties to pattern choose paper 2 angle 0 scale 100.
 select font tool fancypants size 40 sharp stroke width 1, add your name. 
 *****DON'T FORGET YOUR COPYRIGHTS***** 
 Merge visible to save as PNG. 
 GREAT JOB! THANK YOU SO MUCH FOR TRYING MY TUT! 
This tutorial was written by me Nov 18, 2012. 
 Any similarity to any other tut is coincidental and completely unintentional. 
Please do not copy or upload this tutorial to another website. 
 You may share the link to the blog or the tutorial page directly. 
 ☼XtenzivImage☼ 2012 -All artwork used remains the copyright of the owner.

Sunday, July 29, 2012

Enchanted Magic


I am using the beautiful Artwork of Anna Marine 
 You require a license to use this artist. Now selling at CDO 
PTU Scrapkit Enchanted from Hungry Hill
Mask MB AND SW mask37 by Staci Moon Beams and Spiderwebs
Filter Eyecandy 5 Impact, gradient glow

 This Tutorial was created using Corel's Paint Shop Pro® 
 with the understanding that you have a working knowledge of this program. 
(I used PhotoX4 but you should have no trouble recreating it with earlier versions of PSP)
 ****NOTE when you are performing image re-size 
change resolution to 72 before adjusting percentage****

 Open a new image 600 X 500 transparent 72dpi select all 
 open paper 8 copy, paste into selection apply MB and SW mask37 merge group ,
 open frame 2 re-size 65% copy and paste as new layer,
 open window re-size by 55% and paste as new layer 
 open seeds image re-size 40% x 2 place on right side, 
 open deer re-size 40% x 2 place on right side
open cattail, resize by 40% paste as new layer duplicate x 2 and place on left side of frame. 
open lanturn line re-size by 55% move to top. 
open tube paste as new layer duplicate drag one to below frame 2.
 i erased where her hat overlapped frame on top one, but left her wings out, 
then erased parts hanging out bottom of frame on both. 
 open WA-2 and apply eyecandy gradient glow 
 settings basic tab outside glow clicked then from top to bottom 7/ 16 / 71 / 0 / 64 / 100 
white, black, white, black, white.
 add a new raster layer click on your pen tool set as vector draw freehand. 
 draw a curved line on the right where you want your font to sit. 
click on text tool, mouseover line to get the curved text icon 
now using Arkitech Round size 36 write your name. 
on your layers pallete click on the plus sign beside vector layer click the line layer invisible 
and convert to raster. i added a slight drop shadow. 
 *****DON'T FORGET YOUR COPYRIGHTS***** 
I add a gradient glow to mine to make it more visable. 
 Merge visable to save as PNG. 
 GREAT JOB! THANK YOU SO MUCH FOR TRYING MY TUT!
 This tutorial was writen July 29 2012. 
 Any similarity to any other tut is coincidental and completely unintentional.
 Please do not copy or upload this tutorial to another website.
 You may share the link to the blog or the tutorial page directly.
 ☼XtenzivImage☼ 2012 -
All artwork used remains the copyright of the owner.

Cherry Devil


I am using the beautiful Artwork of Joe Peck 
 You require a license to use this artist. 
Font:Vinyl Stickons and Before the rain
PTU Scrapkit Cherry Pie from Hungry Hill purchase this kit and many others Here 
Mask MB AND SW mask37 by Staci Moon Beams and Spiderwebs
Filter Mura's Meister Copies. 

This Tutorial was created using Corel's Paint Shop Pro® 
 with the understanding that you have a working knowledge of this program. 
(I used PhotoX4 but you should have no trouble recreating it with earlier versions of PSP)


 Open a new image 600 X 500 transparent 72dpi select all
 open paper one copy, paste into selection. 
Apply MB and SW mask37 merge group ,

 open beadscatter, resize 40%, copy and paste as new layer. 
Apply muras copies:  preset line, tile, behind,number 1
 shift x and scale set at 100 the rest at 0 
reapply mask, merge group. 

 Open tube copy and paste as new layer 
apply muras copies preset line, tile, behind,number 1 
shift x and scale set at 100 the rest at 0, 

You can play around with your settings to get your desired effect.

 Reapply mask, merge group.
 Open checkered-frame image resize change resolution to 72, 
it should automatically change pixel demension percentage to 49 , 

click all layers ok. Add drop shadow Horizontal 5 vertical 6 opac 43 blur 3 color black,
duplicate and place touching each other at corners, see tag for placement.

 Merge the two frames. then click freehand selection tool, selection type : point to point, 

click around both frames add a new raster layer open paper 12 and paste into selection, 
select none, now drag copies tube layer in between 

 open board, re-size (change resolution to 72) by 50% 
 open sparkles paste as a new layer. 
open and apply tube re-size 90 %

 Add drop shadow Horizontal 5 vertical 6 opac 43 blur 3 color black, 

open bottle re-size 50% x 2 
open woven-pastry-pie re-size 50% x 2 
open liqueur re-size 50% x 2 
open cherries re-size 50% x 2 duplicate and place on the corners of the frame. 

Now add your text..I chose to write Cherry in vinyl stickons and Devil in before the rain..

but you can get creative .. put "How about" in vinyl stickons and "Pie" in before the rain..

 wink wink! and thats it

 *****DON'T FORGET YOUR COPYRIGHTS***** 

 Merge visible to save as PNG.

 GREAT JOB! THANK YOU SO MUCH FOR TRYING MY TUT! 

This tutorial was writen July 29 tag made May 10th 2012. 
Any similarity to any other tut is coincidental and completely unintentional.
Please do not copy or upload this tutorial to another website. 
 You may share the link to the blog or the tutorial page directly. 

 ☼XtenzivImage☼ 2012

 -All artwork used remains the copyright of the owner.

Tuesday, April 10, 2012

Simply Barbara


I am using the beautiful Artwork of Barbara Jenson 
 You require a license to use this artist. Burlesque sells at Scraps and the City 
Font: Passions Conflictb 
PTU Scrapkit LadyHawwk Designs Simply Teal.Here 
Mask MB AND SW mask 22 by Staci Moon Beams and Spiderwebs. 
 This Tutorial was created using Corel's Paint Shop Pro® 
 with the understanding that you have a working knowledge of this program.
 (I used PhotoX4 but you should have no trouble recreating it with earlier versions of PSP) 

**Program Tip: If you highlight your text and highlight the font name then you can scroll up and down though your fonts to preview how they look on the tag** 

 Open a new image 600w X 500h transparent 72dpi select all 
 open paper 13 and apply MB and SW Mask 22 merge group. 
 resize by 70% copy and paste into selection. Select none. 
 I used my pick tool and dragged the mask out on the sides to fill the canvas. 
 open Frame 6 resize by 70 %  
 Paste as a new layer.  
 open element 56 resize by 50% image flip horizontal copy paste as new layer move to top right of frame merge down, 
 open element 54 drag this below your frame layer using your eraser erase wood part of frame so the clock shows thru careful not to erase the flowers.
 open and resize tube to your liking add a drop shadow vertical 1 Horizontal -9 opac 57 blur 7 color black
 duplicate and drag one layer below the frame now return to the one above and erase so it looks like her legs are inside but her wings stay outside.
 open and resize element 29 by 50 % place on far side of frame  
 open and resize element 8 by 50 % place on far side of frame on top of 29  
 open and resize element 2 by 50 % place on far side of frame on top of the other elements  
 open element 5 copy and place on far side as well 
 Add drop shadow vertical 1 Horizontal -1 opac 57 blur 3 color black add your text, 
 open and resize element 11 by 50 % place on bottom of frame repeat last drop shadow 
i used Passions Conflict 48 color forground r=0 g=0 b=0 color background r=33 g=124 b=172 but many script fonts would look great with the tag.
 *****DON'T FORGET YOUR COPYRIGHTS***
 GREAT JOB! 
 THANK YOU SO MUCH FOR TRYING MY TUT! 
This tutorial was created Apr 8th 2012.
 Any similarity to any other tut is coincidental and completely unintentional. 
Please do not copy or upload this tutorial to another website. 
 You may share the link to the blog or the tutorial page directly.
 ¤XtenzivImage¤ 2012 
-All artwork used remains the copyright of the owner.

Saturday, April 7, 2012

OpaliteFlower


I am using the beautiful Artwork of Rachel Anderson 
 You require a license to use this artist. Now selling at CDO 
PTU ScrapBundle LHD Anderson package 19 Here  
It's awesome you get the kit and 3 GORGEOUS TUBES

Mask MB AND SW Forum mask 6 by Staci Moon Beams and Spiderwebs 
Filter Eyecandy5 Impact gradient glow 
 This Tutorial was created using Corel's Paint Shop Pro® 
 with the understanding that you have a working knowledge of this program.
 (I used PhotoX4 but you should have no trouble recreating it with earlier versions of PSP) 

**Program Tip: If you highlight your text and highlight the font name then you can scroll up and down though your fonts to preview how they look on the tag** 

 Open a new image 600 X 250 transparent 72dpi select all 
 open paper 8 copy and paste into selection 
 add a new raster layer open and copy paper 9 paste into selection/ select none 
 apply MB and SW Forum mask 6 merge group 
 Add drop shadow vertical 1 Horizontal -9 opac 63 blur 7 color black
 open element 20 resize by 50% Image flip horizontal move to bottom right of tag. 
 Add drop shadow vertical 1 Horizontal -9 opac 37 blur 7 color black 
 open and resize element 22 by 30% Image flip horizontal move to top right of tag. 
 open element 28 resize by 50% image rotate right all layers by 45 and paste as new layer, 
 Add drop shadow vertical 1 Horizontal -9 opac 37 blur 7 color black
 open and resize Wordart by 15% effect plugins eyecandy impact 5 gradient glow.
 settings check outside glow/ glow radius 8.76 / soft corners 2/ overall opacity 55/
 distortion 4/ lump size 6/ smoothness 100 color #ffcoff r=255 g=192 b=255 
 Now add your tube i put mine in the middle and down a bit 
you decide where you think it looks best. 
 Add drop shadow vertical 1 Horizontal -9 opac 57 blur 7 color black add your text, 
i used Shipped Goods sizz 48 color forground r=78 g=54 b=139 color background r=200 g=170 b=202 but many script fonts would look great with the tag.
 *****DON'T FORGET YOUR COPYRIGHTS***

** DUPLICATE THE TAG MINIMIZE go to the original Merge all flatten save as a jpeg. close


AVATAR *** RESTORE DUPLICATE TAG*** 
 click on tube layer image flip horizontal resize by 89% and move her over to the far right
 click on whiteflower layer drag closer to tube see mine for approx placement
 I also dragged my text over. leaving room between edge and font too add a border 
 merge all flatten crop a 150 X 150 select all 
image modify contract selections invert by 4 flood fill with forground. 
(forground and background properties unchanged from font settings)
 image modify contract by 2 flood fill with background. 
 *****DON'T FORGET YOUR COPYRIGHTS***** Merge all flatten save as a jpeg.
 GREAT JOB! 
 THANK YOU SO MUCH FOR TRYING MY TUT! 
This tutorial was created Apr 6th 2012.
 Any similarity to any other tut is coincidental and completely unintentional. 
Please do not copy or upload this tutorial to another website. 
 You may share the link to the blog or the tutorial page directly.
 ☼XtenzivImage☼ 2012 
-All artwork used remains the copyright of the owner.

Wednesday, March 21, 2012

Harvest Angel


I am using the beautiful Artwork of Dave Nestler 
 You require a license to use this artist. Now selling at CDO 
Font:LainieDaySH 
PTU Scrapkit Harvest Home Hungry Hill purchase this kit and many others Here 
Mask MB AND SW mask22 by Staci Moon Beams and Spiderwebs 
Filters Mura's Meister Copies. 
                                    Visman VM Toolbox Dynamic Diffusion 
This Tutorial was created using Corel's Paint Shop Pro® 
 with the understanding that you have a working knowledge of this program.
 (I used PhotoX4 but you should have no trouble recreating it with earlier versions of PSP) 
**Program Tip: If you highlight your text and highlight the font name then you can scroll up and down though your fonts to preview how they look on the tag** 


 Open a new image 600 X 500 transparent 72dpi 
 open doodle-1 resize by 90 % paste as a new layer resize again by 90
 apply mura copies with the following settings: 
preset Encircle
 circle,
 tile mode, 
behind 
number 12, shift x and y at 50, Angle and Attenuation 0, Rotation cycle and scale 100, phase -25,
 open the jpg or merged angel picture that comes with the tube 
 apply VMToolbox dynamic diffusion horizontal and vertical setting 153 copy.
 Click on your tag add a new raster layer, select all, edit- paste into selection 
apply MB and SW mask22 merge group , duplicate move one up and the other down.
 add a new raster layer, select all. open grapevine heart copy and paste into selection, 
resize first by 90% then again by 80% 
 open and resize love by 43% copy and paste as new layer resize again by 70%
 open tag resize by 43% copy and paste as new layer, duplicate image flip vertical
use eraser tool with a furry or fuzzy texture size 38 step 25 roation 0 hardness, density, opac all set to 100 gently erase the edge of the top tag so it looks uniform when satisfied merge layer down
 add your text, i used lainey day but many script fonts would look great with the tag.
Now add your tube move it to where your happy i put mine just over the edge of the heart frame.
 duplicate make sure your on the top one and adjust blur gausion blur 3
reduce the opacity to 34 merge down.
Add drop shadow Horizontal 4 vertical -4 opac 63 blur 3 color black to your tube, tag and love elements

 *****DON'T FORGET YOUR COPYRIGHTS*****
 Merge visable to save as PNG. it also looks fantastic with a black background!

(add a new raster layer once merged visable drag the layer to the bottom flood fill black)
 Merge all flatten to save as a jpeg.
 GREAT JOB! THANK YOU SO MUCH FOR TRYING MY TUT!
 This tutorial was created March 19th 2012.
 Any similarity to any other tut is coincidental and completely unintentional.
 Please do not copy or upload this tutorial to another website.
 You may share the link to the blog or the tutorial page directly.
 ☼XtenzivImage☼ 2012
 -All artwork used remains the copyright of the owner.

Sunday, December 25, 2011

Christmas Spirit


I am using a gorgeous PSP TuBE Stop tube Katerina Koukiotis 
 You require a license to use this artist. Now selling at PSP TUBE STOP
PTU Scrapkit Silent Night by Hungry Hill
 purchase this kit and many other fabulous kits Here 
 Mask of choice i used MC_mask13 i believe it's from creative misfits
If you know where it's from i would love to link it contact me on facebook.
 This Tutorial was created using Corel's Paint Shop Pro®
 With the understanding that you have working knowledge of this program.
 (I used PhotoX3 but you should have no trouble recreating it with earlier versions of PSP) 

 Open a new image 600 X 500 transparent 72dpi open paper 4 
copy and paste onto your tag as a new layer 
 apply MC_mask source luminance fit to canvas and hide all mask selected. 
 open and resize circle by 50% place in the top right of your tag 
open and resize lantern by 50% do this twice place just off the edge of the circle 
open and resize branch by 50% place along the bottom duplicate and mirror
 open and resize flakes by 50% do this twice duplicate place one on each side
 open and resize corner branches by 50% do this twice place on left side
 add a drop shadow i used v= -1 H= 3 opac 69 and blur 4
open and resize ornament4 by 50% do this three times.
 Open Katerina Koukiotis Christmas Spirit resize by 80%
drop shadow with V= -5 H=8 O=49 blur 18 color black.
open and resize ornament4 by 50% do this three times.
duplicate place infront of your tube rotate one left by 30 or so.
 open and resize WA first by 50% then by 80% Christmas and greetings is what i used
 but you can use whichever ones you like. I added a gradient glow eyecandy 5 impact.

 That's it your done! Merge all flatten.
 *****DON'T FORGET YOUR COPYRIGHT INFORMATION*****
 GREAT JOB! THANK YOU SO MUCH FOR TRYING MY TUT!
This tutorial was created Dec 24 2011.
 Any similarity to any other tut is coincidental and completely unintentional.
 Please do not copy or upload this tutorial to another website.
 You may share the link to the blog or the tutorial page directly.
 ☼XtenzivImage☼ 2011 -All artwork used remains the copyright of the owner.http://www.psptubestop.com/StorePages/StoreMain.php

Thursday, November 17, 2011

Tarnished


I'm using the beautiful Artwork of The Hunter 
 You require a license to use this artist. Now selling at PTE
PTU Scrapkit Tainted by Hungry Hill purchase this kit and many other fabulous kits Here 
 Mask from WeeScotsLass Mask WSL_266 It will be in the 241-300 4shared link on the right. 
 This Tutorial was created using Corel's Paint Shop Pro® 
 With the understanding that you have working knowledge of this program. 
(I used PhotoX3 but you should have no trouble recreating it with earlier versions of PSP)
 Open a new image 600 X 500 transparent 72dpi 
 open paper 9 copy and paste onto your tag as a new layer 
 apply WSL mask source luminance fit to canvas and hide all mask selected. 
open and resize smear by 80% place near the bottom
 open and resize lattice by 60% duplicate and mirror add drop shadow 
V= -2 H=2 O=100 blur 2 color black to both i did this step twice. 
Open The Hunter Leo-Zodiac drop shadow with V= -4 H=4 O=59 blur 5 color black.
 (to hide her butt like i did duplicate the girl) open and resize WA_Tarnished by 80% 
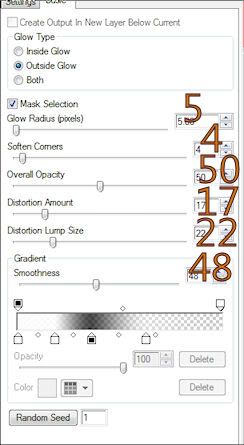
apply gradient glow I used eyecandy 5 check outside glow/ glow radius 5/ soft corners 4/ overall opacity 50/ distortion 17/ lump size 22/ smoothness 48 double white then black then white
   
 (move it around till it hides her butt, when happy Slide the tarnished WA to between the two girl layers now erase the top girls butt, this leaves her boots on top of the WA.) 
 Added my font Romance Fatal serif size 65 black outline stroke width 1
 #7f5437 R=127 G=84 B=55 for the color placed just inside the frame on the bottom.
 Repeat the glow side under the girl so it looks like shes touching it. 
open and resize rose by 30% then flip the image place near the bottom
 open and resize letterbox by 30% place near the bottom in front of the stem cutoff of the rose. 
 That's it your done! Merge all flatten. 
 *****DON'T FORGET YOUR COPYRIGHT INFORMATION***** 
 GREAT JOB! THANK YOU SO MUCH FOR TRYING MY TUT!
 This tutorial was created Nov 10 2011. 
 Any similarity to any other tut is coincidental and completely unintentional.
 Please do not copy or upload this tutorial to another website. 
 You may share the link to the blog or the tutorial page directly. 
 ☼XtenzivImage☼ 2011 
-All artwork used remains the copyright of the owner.

Tuesday, November 15, 2011

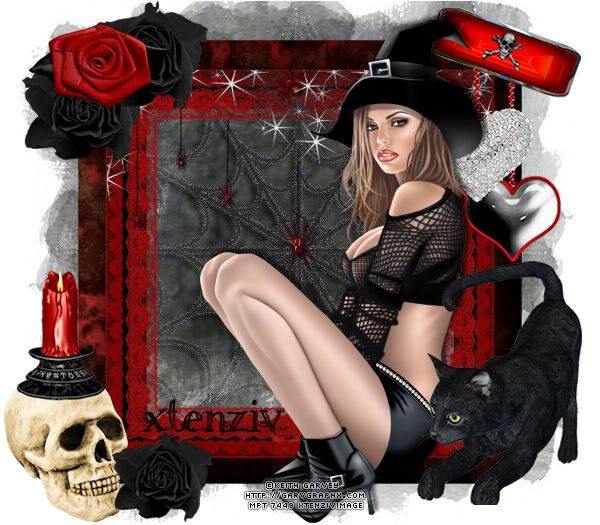
Dark Witch

I am using the beautiful Artwork of Keith Garvey 
 You require a license to use this artist. Now selling at PTE 
Font: Pieces of Eight
PTU Scrapkit Dark Mistress by Hungry Hill purchase this kit and many other fabulous kits Here  
Mask from WeeScotsLass Mask WSL_254 It will be in the 241- 300 4shared link on the right.
 This Tutorial was created using Corel's Paint Shop Pro® 
 With the understanding that you have working knowledge of this program. 
(I used PhotoX3 but you should have no trouble recreating it with earlier versions of PSP)
 Open a new image 600 X 525 transparent 72dpi 
 open paper 3 copy and paste onto your tag as a new layer
 apply WSL mask source luminance fit to canvas and hide all mask selected.
open and resize frame by 70% Add a new raster Layer
using your selection tool set to rectangle
 trace out the frame from just under the matte and only half way down,
open and copy spider web header paste header into the selection.
See my tag for reference if you need to but tuts are just a reference it’s all about your originality.
 open and resize dangle by 43% mirror and place on right side
open and resize poor yorick by 23%
open and resize candle by 23% and place on yoricks head.
open and resize black rose by 20% place onto the tag
now duplicate the rose twice so you have three all together
 place two at the top of the frame spread apart a little.
duplicate the remaining rose and resize 80% place at the bottom of the tag by yoricks jaw.
 Open Keith Garveys Tabitha resize by 90% drop shadow with V= -4 H=3 O=100
 blur 5 color black. open and resize kitty by 40%
Added my font Witchcraft size 30 black outline stroke width 1 #8d0000 R=141 G=0 B=0 for the color placed just inside the frame on the bottom.
That's it your done! Merge all flatten.
 *****DON'T FORGET YOUR COPYRIGHT INFORMATION*****
 GREAT JOB! THANK YOU SO MUCH FOR TRYING MY TUT!
This tutorial was created Nov 09 2011. Any similarity to any other tut is coincidental and completely unintentional. Please do not copy or upload this tutorial to another website.
 You may share the link to the blog or the tutorial page directly.
 ☼XtenzivImage☼ 2011
 -All artwork used remains the copyright of the owner.

Thursday, November 10, 2011

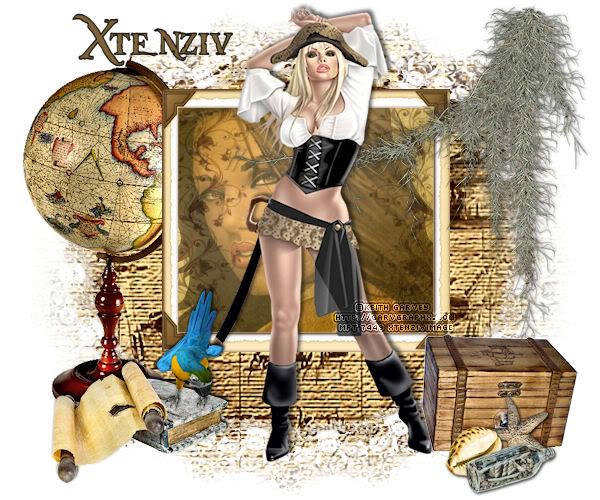
pearlsnparrots

I am using the beautiful Artwork of Keith Garvey 
 You require a license to use this artist. Now selling at PTE 
Font: Pieces of Eight
PTU Scrapkit Pearl Of The Carribean by Hungry Hill 
purchase this kit and many other fabulous kits from her store  
 This Tutorial was created using Corel's Paint Shop Pro®
 with the understanding that you have a working knowledge of this program.
 (I used PhotoX3 but you should have no trouble recreating it with earlier versions of PSP) 
 Open a new image 600 X 500 transparent 72dpi 
 open and resize map mask 80 % place onto the tag 
open and resize globe by 60% paste as a new layer
 ***Or Drop n drag from layers pallet onto tag** 
 close all original elements without saving.
 open and resize frame-snapshot 50%  now using your selction tool set to rectangle
 trace out the frame add a new raster layer drag this layer beneath frame 
 now open and copy paper 3 paste into selection on the new layer you just made
 keeping the selection active I used Garv's Peel image i just mirrored copied and
 pasted as new layer selections invert then delete. 
 open and resize moss by 80% mirror and place on right side
 I added a drop shadow V=0 H=1 O=59 blur 4 color black. open and resize stash box 30% 
open Garv's Pirate girl 2 resize by 90% drop shadow V= -4 H=3 O=63 blur 7 color black.
 Move her around till she's almost center to the frame behind her but you can still see other girl,
butt her foot up against stashbox. Open and resize starfish first by 30% then again by 40% 
place onto the tag open and resize shell 4 first by 30% then again by 40% place onto the tag
open and resize ship in a bottle by 15% place onto the tag drop shadow those 3 elements
 V=1 H=1 O=100 blur 4 color black.
 open and resize scroll and book by 25% place onto the tag
open and resize parrot 2 by 25% place onto the tag.
 drop shadow these two with V= -2 H=1 O=100 blur 4 color black.
 Added my font Pieces of Eight black outline stroke width 1 #7e6236 R=126 G=98 B=54 for the color placed at the top merge all flatten. That's it your done!~
*****DON'T FORGET YOUR COPYRIGHT INFORMATION*****
 GREAT JOB! THANK YOU SO MUCH FOR TRYING MY TUT!

This tutorial was created Nov 08, 2011
Any similarity to any other tut is coincidental and completely unintentional.
Please do not copy or upload this tutorial to another website.
 You may share the link to the blog or the tutorial page directly.
 ☼XtenzivImage☼ 2011 -All artwork used remains the copyright of the owner.

Thursday, September 22, 2011

Sweet Cherry


I am using the beautiful Artwork of Dave Nestler  
 You require a license to use this artist. Now selling at CDO 
Font: Cooper black 
 PTU Scrapkit Cherry Pie by Hungry Hill 
(long since removed)

This Tutorial was created using Corel's Paint Shop Pro® 
 with the understanding that you have a working knowledge of this program. 
(I used PhotoX2 but you should have no trouble recreating it with earlier versions of PSP)
 **Program Tip: If you highlight your text and highlight the font name then you can scroll up and down though your fonts to choose your favorites** 
 Open a new image 600 X 500 transparent 72dpi 
 open tag from the element folder resize by 80% do this twice paste as a new layer. 
 open layered frame resize by 80% do this twice paste as a new layer.
 using your magic wand tool click inside the middle of the layered frame 
make a new raster layer drag beneath the frame
 now open and copy paper 9 paste into selection. 
 open spring tie and resize by 50% place on the top of your layered frame.
duplicate the string layer and resize it by 50%,
 just leave it for a minute go back down to your tag layer and duplicate it 
bring it to the top layer and using your pick tool resize and reshape into a small nametag 
place your spring tie at the top 
 open woven pastry pie resize by 50% do this twice 
open liquer bottle resize by 50% then again by 80% 
 open both word art sweet and cherry pie resize both by 50% do this twice
 place them together and merge down now add a gradient glow..
 I used eyecandy 4000 glow width 5.52 soft corners 25% over opacity 100 check draw only outside

   
 Now paste your tube and your water mark. Using your text tool set as vector add your name ..
 now right click on your font convert text to curve as character shape 
now go to each letter and rotate them left n right to your liking.
 merge all flatten. 
 GREAT JOB! THANK YOU SO MUCH FOR TRYING MY TUT! 
This tutorial was created August 1st 2011. 
 Any similarity to any other tut is coincidental and completely unintentional.
Please do not copy or upload this tutorial to another website. 
 You may share the link to the blog or the tutorial page directly.
 ☼XtenzivImage☼ 2011 -All artwork used remains the copyright of the owner.

Monday, August 1, 2011

Flutter Dew


I am using the beautiful Artwork
of Barb Jensen
You require a license to use this artist.
Font: LainieDaySH

PTU Scrapkit Dew Drop Inn by Sarah at Hungry Hill
She has gorgeous kits and sells at a few stores please check out her site!~
Mask from WeeScotsLass MaskWSL_mask297
it will be in the 241- 300 4shared link on the right.

This Tutorial was created using Corel's Paint Shop Pro®
with the understanding that you have a working knowledge of this program.
(I used PhotoX2 but you should have no trouble recreating it
with earlier versions of PSP)
**Program Tip: If you highlight your text and highlight the font name then
you can scroll up and down though your fonts to choose your favorites**

Open a new image 600 X 500 transparent 72dpi
selections select all paste paper 8 into selection apply mask WSL_mask 297
open and resize vine by 60 % place to the left side open string4 resize by 60%

open and resize simple frame3 by 60% paste as a new layer
use your magic wand select inside frame
modify expand by 3-5 pixels add a new raster layer
drag beneath frame layer paste paper 9 into selection


open flower2 resize 40% do this twice duplicate 4 times and place
a one at the top rest around the bottom of the frame.
flower1 resized 80 % i put some of flower2 above this to hide the stem

I resized fluttery bug by 40% added it as a new layer then duplicated
and resized again to place on the oppisite side of the frame.

open and resize scattered hearts by 60% mirror and place on left side
I added a drop shadow to a couple of the elements but not all of them
i used V= -2 H=2 O=85 blur 2 color black.

added the tube and adjusted the drop shadow V= -4 H=9 O=63 blur 7 color black.
Added my font LainieDay SH black outline and #d66d73 for the color
merge all flatten.

GREAT JOB!

THANK YOU SO MUCH FOR TRYING MY TUT!
This tutorial was created August 1st 2011.
Any similarity to any other tut is coincidental and completely unintentional.
Please do not copy or upload this tutorial to another website.
You may share the link to the blog or the tutorial page directly.
☼XtenzivImage☼
2011 -All artwork used remains the copyright of the owner.

Saturday, June 11, 2011

c-RAC-k Shot.


I am using the beautiful Artwork
of Ismael Rac
You can Purchase this artist at Xeracx Store
Font: True Crimes
Scrapkit Crack Shot by Sarah at Hungry Hill
Mask from WeeScotsLass Mask WSL_255
it will be in the 241- 300 4shared link on the right.

This Tutorial was created using Corel's Paint Shop Pro®
with the understanding that you have a working knowledge of this program.
(I used PhotoX2 but you should have no trouble recreating it
with earlier versions of PSP)
**Program Tip: If you highlight your text and highlight the font name then
you can scroll up and down though your fonts to choose your favorites**

Open a new image 600 X 500 transparent 72dpi
selections select all paste paper 2 into selection apply mask WSL_255
resize frame by 70% paste as a new layer
use your magic wand select inside frame
modify expand by 3-5 pixels add a new raster layer
drag beneath frame layer paste paper 7 into selection
do not deselect paste close up of your tube as a new layer
move around so it looks good inside the frame.
Then invert selection and press delete. Deselect.
Change tube layer properties to soft light.

♥♥~ADD YOUR ARTIST COPYRIGHTS AND LICENSE INFO~♥♥

Still with me .. GOOD now I added the rest of the elements
button string resized 70%
chalk line resized 30 %
Heart2 resized by 10 duplicate 4 times and place
a couple on each side of the frame.
police tape resized by 30%
Cuffs resized 40 %
I added a drop shadow to a couple of the elements but not all of them
i used V= -2 H=2 O=85 blur 2 color black.
added the tube and adjusted the drop shadow blur to 7 Opac.to 65
Added my font True Crimes black outline and #ee853a for the color
merge all flatten.

GREAT JOB!

THANK YOU SO MUCH FOR TRYING MY TUT!
This tutorial is my own creation. Any similarity to any other tut is
coincidental and completely unintentional.
Please do not copy or upload this tutorial to another website.
You may share the link to the blog or the tutorial page directly.
☼XtenzivImage☼
2011 -All artwork used remains the copyright of the owner.

Wednesday, April 20, 2011

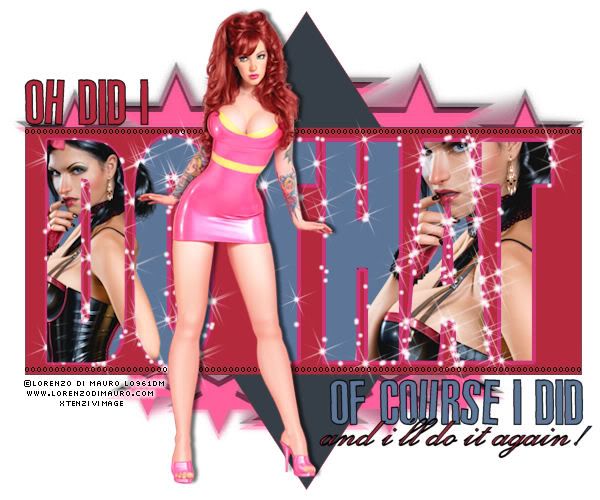
Did i do that?


I am using the beautiful Artwork
of Lorenzo DiMauro
You can Purchase this artist and many more at PsP Tubes Emporium
Fonts:
Exmouth
Vinyl stickons

My Mask SUPPLIES The template is also included in case you’re in a hurry..lol
This Tutorial was created using Corel's Paint Shop Pro® with the understanding
that you have a working knowledge of this program.


(I used PhotoX2 but you should
have no trouble recreating it with earlier versions of PSP)
**Program Tip: you can click and drag open items onto a working canvas,
in order to do this you need to have your layers palette open then just select the layer you want then click and drag it to your canvas**

Open a new image 600 X 600 transparent 72dpi
Set your background color to #363e47 and stroke color #a42c3d
Using your selection tool and star 2 draw out a fairly large
selection almost fill the canvas.
Open a new raster layer and drag it beneath the star layer,
selections select all then flood fill with black #000000 apply XtenzMask 1 merge group. Open a new raster layer it should already be selected but if not… selections select all now choose a color from your tube, I used #fd609b and flood fill the layer pink.. again apply my mask
Click on the star layer and add a new raster layer using your selection tool set to rectangle draw out level with the stars right and left points.
Flood fill the rectangle with a color from your tube I used #b4293c .
Now add your slogan or text I used Impact for DO THAT size 125 and used the color from her eyes, covert to raster layer / selections/ select all/ float and defloat then selections modify select selection borders set to 3 both checked add a new raster layer and flood fill with #ce3575 to make it sparkle
I used Eye Candy Impact constellation show image clicked random seed until I got something I liked (but it is a pay filter so to get a sparkly effect you can add noise or find a sparkle you like and use that. )
Click on the DO THAT layer selections / select all paste your tube as a new layer, duplicate tube and hide one arrange image in the font then making sure your on the tube layer invert the selection and delete the excess again invert the selection un hide the other and resize it by 60 or 70% arrange it in the font on the other side. Invert and delete. Select none.
ADD YOUR COPYRIGHTS
Still with me .. GOOD now I added the rest of the slogan oh did I on the top and of course I did on the bottom. I also used a small font pixelette to add the letter O to the top and bottom of the template rectangle.Add the tube again or choose another from the same artist and paste as new layer resize as necessary add a slight drop shadow and your done!

GREAT JOB!


THANK YOU SO MUCH FOR TRYING MY TUT!


This tutorial is my own creation. Any similarity to any other tut is
coincidental and completely unintentional.
Please do not copy it, upload it to another website. You may share the link to
the blog or the tutorial page directly.
☼XtenzivImage☼ ©2011 -All artwork used remains the copyright of the owner.