
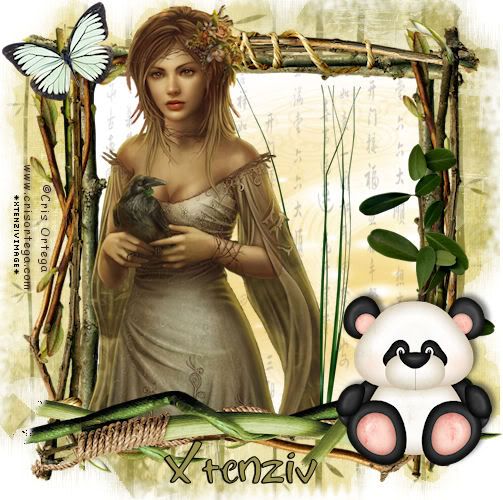
I am using the beautiful Artwork
of Cris Ortega His SciFi & Fantasy Gallery
Font:
Charlie
Scrapkit Welcome to China
Chili Designzz
(This is a PTU kit.)
Mask WSL_Mask 222 By Chelle
Unzip to your masks folder.
This Tutorial was created using Corel's Paint Shop Pro® with the understanding
that you have a working knowledge of this program.
(I used PhotoX2 but you should
have no trouble recreating it with earlier versions of PSP)
**Program Tip: you can click and drag open items onto a working canvas, in order
to do this you need to have
your layers palette open then just select the layer you want then click and drag
it to your canvas**
Open a new image 600 X 600
transparent
Select all then Open Chili WTC Paper3 paste into selection
Open frame 3 resize by 80% copy n paste to your tag
Select magic wand tool set settings to Add, shift, /rgb/ Tolerance and feather set to 0, contig and antialias checked outside selected from dropdown
select inside the frame then selection expand by 15 add a new layer
Open journal 2 copy n paste into
selection drag to below frame layer.
open grass and leaves and bambo
as you resize each element by 50% click and drag to your tag
ensure you close original without saving
Arrange as desired
** if your like me and you never
save your work in progress this is a good spot to remember save this file as a
psp image
( i created a WIP(work in progress) folder in my psp folder eg: C:\Users\Xtenziv\Documents\My
PSP Files\WIP) **
Open Panda and resize by 40% click and drag to tag
place in bottom right corner.
Add a drop shadow i used V=4 H= -4 Opac=70 blur=9 color Black.
Open Butterfly click and drag to tag
Mirror image and place on the frame top left.
Select your tube and paste as new layer on your tag resize as needed, repeat
drop shadow
Add your name I chose Charlie, Font Size 48 I used #9a924b An olive color.
Then repeat font step with black as color then pull that layer below olive
layer,
offset just a little to make it look like a shadow.
Add All copyright information most require name and URL to be
CLEARLY VISABLE on your creations
ALSO REMEMBER to have your copyrights in a color that can be seen on any
background color
I recommend adding a gradient glow or a small white drop shadow to inhance
copyrights
Now go back to the first layer Chili WTC Paper3 and apply mask WSL_Mask 222
Merge group layers. Select eraser tool set on size 25 Hardness 34, Step 32 , Density 100, Opacity 57 soften
mask edges so that merged image doesn't have a sharp edge
Merge all visable copy n paste tag as new image.. this should make image size
503 by 500
GREAT JOB!
THANK YOU SO MUCH FOR TRYING MY TUT!
This tutorial is my own creation. Any similarity to any other tut is
coincidental and completely unintentional.
Please do not copy it, upload it to another website. You may share the link to
the blog or the tutorial page directly.
☼XtenzivImage☼ ©2010 -All artwork used remains the copyright of the creators.
No comments:
Post a Comment